Last updated: July 2026
The AI assistant can help you do takeoffs straight from a drawing — counting items, measuring lengths, measuring areas — without leaving Doclio. Area questions produce measured quantities: the AI finds each surface, then Doclio traces it against the drawing's own linework at your set scale and measures it — see AI Takeoffs & the Flood Tool for how the measured flow works. Takeoffs run in the Doclio Estimator mode of the chat (switch via the mode chip in the chat header — see AI modes). This article walks through how to ask, how to refine the result, and how accurate to expect the answers to be.
Companion: AI Assistant — Overview & Credits covers what credits are, how much things cost, and how monthly credits and top-up packs work. Read that first if you haven't already.
Before you start
- Set a scale on the drawing. Open the drawing, click the SCALE tool, draw a line on a known dimension, type the real distance. Without a scale, length / area numbers come back as raw pixels — useless for takeoff. Scale only needs to be set once per drawing.
- Run the AI INDEX (recommended). The AI assistant treats indexed dimension callouts as authoritative for any area / takeoff calculation, so an indexed drawing produces materially better takeoff numbers than an unindexed one.
- From the drawing viewer: click the ✨ (sparkles) icon next to the drawing title, confirm in the modal, and the analyse pass runs (3 credits). A green check appears once analysed; hover for the analysed-on date and what was extracted.
- From the gallery (bulk): click the ✨ AI button on the gallery toolbar and pick a scope (whole project, current group filter, tags, or selection). "Skip drawings already analysed" defaults to ON so re-runs don't re-charge.
- Open the drawing you want to query. The chat assistant uses the currently-open drawing as context. If you ask without a drawing open, the assistant asks you to pick one first.
The two ways to ask
By name
Just type the question:
- "How many downlights are on this drawing?"
- "How many GPOs?"
- "What's the area of the master bedroom?"
- "Find every door."
The assistant uses the cached drawing index (the legend, room labels, etc.) to interpret what you mean. Best for clearly-named items that appear in the legend.
By exemplar (paste a sample)
For materials, hatched zones, or symbols where the name is ambiguous (e.g. "cladding" can mean different things on the same drawing), paste a screenshot of the pattern or symbol directly into the chat input, then ask.
- Snip a clean sample of the material/symbol from the drawing (Windows: Win+Shift+S; Mac: Cmd+Shift+4).
- Click in the chat input and paste (Ctrl+V / Cmd+V) — OR click the 📎 attach icon next to the help button.
- A small "Reference: [thumbnail]" pill appears above the input. Type your question: "What is the area of this material?", "Find every instance of this fitting.", "How many of these symbols?"
The AI matches the reference visually against the drawing — same pattern, same shape — so it picks up regions or instances even if the name varies. This is the recommended approach for cladding, paving, roofing, hatched zones, and any custom symbol that's not in a standard legend.
Walkthrough — counting downlights
- Open an electrical / lighting drawing. Make sure the scale is set.
- Open the AI chat (the AI button in the main header; on mobile, the lightbulb in the nav bar).
- Type: "How many downlights are on this drawing?" Hit send.
- Wait ~10–15 seconds while the assistant reads the drawing. A progress message shows while it works.
- The reply lands as something like: "Approximately 14 downlights — please verify against the legend." Two buttons appear: Show me on drawing and Try again.
- Click Show me on drawing. An ephemeral preview opens — purple dashed pins appear across the page under a "DRAFT" banner, so you can check placement before anything is saved. A Refine pass fires automatically to re-check each pin and tighten its position.
- Drag any pin that landed off-target in the preview. The model gets pin positions right ~90% of the time, but dense ceiling plans can land a pin on a neighbouring fitting.
- When you're happy, click Save as group on the chat result to commit the pins as a saved annotation group on the drawing (under your project's "AI Finding" or "Takeoff" type). Don't want to keep them? Click Discard and nothing is saved.
- Once saved, the group behaves like any other annotation group — edit, move, or delete its pins normally.
Credit costs for each step are in the cost summary table below.
Before you spend credits: for counting questions, Estimator first checks whether the answer already exists in your project — an issued report, a human annotation, or a previously-reviewed AI takeoff. If it finds one it shows it at no credit cost, with options to use the existing figure, verify with a fresh AI takeoff, or continue anyway. So confirming "do I already have this?" is free.
Walkthrough — cladding area takeoff
- Open an elevations sheet showing the cladded surfaces. Set a scale and (highly recommended for area queries) run the AI INDEX from the title-bar ✨ icon.
- Snip a clean sample of the cladding pattern from one of the elevations — ideally a section that's clearly visible, not obscured by dimension lines or windows.
- Open the chat. Click into the textarea, paste the screenshot. The "Reference" pill appears.
- Type: "What is the area of cladding with this pattern?" Hit send.
- Wait ~15–20 seconds. The assistant walks each elevation as a separate finding and identifies regions matching your swatch — then the app traces each region against the drawing's vector linework and measures it at the drawing scale. The model's own callout arithmetic is kept as a preliminary working you can read behind the WORKINGS pill.
- The reply lands as a one-line answer (e.g. "Approximately 168m² of cladding across all four elevations.") followed by a Math breakdown table. The breakdown is your record of truth — see the next section for what it shows and how to read it.
- If the numbers in the breakdown look right, click Show me on drawing. Traced outlines appear over each cladded region as a DRAFT overlay, with openings (windows, doors) subtracted automatically on hatched surfaces, and the DRAFT TAKEOFF panel lists one measured row per region with a running total. On a vector drawing with a scale set, the traced shape IS the measurement — click any region to fine-tune it in the FLOOD editor and the area and totals recompute instantly.
- If the numbers look wrong, you don't need to click Show me at all — just use the 📋 COPY or 💾 CSV buttons on the breakdown card to get the data into your takeoff sheet, where you can correct anything that's off.
Cladding-specific tips
- Pick a representative swatch. If the elevation has the same cladding rendered with subtly different shading (e.g. a light area near a window vs darker areas mid-wall), snip from the most-typical zone. The model matches visually, so the more "average" the swatch, the better the inclusive match.
- Dimension callouts are the model's accuracy lever. Drawings with thorough dimension annotation produce the best takeoff results. If the eave height is printed as "3.2m", the AI uses it directly. If you'd have to mentally estimate, so does the AI — expect ~10% drift in those zones. Running the AI INDEX first (see "Before you start") closes the most common error source: the model picking a partial dimension chain instead of the full edge.
Reading the math breakdown
For any area query (cladding, room areas, paving, roofing), the chat result includes a Math breakdown card with one row per finding. Each row shows:
| Column | What it means |
|---|---|
| Label | Which surface this row covers (e.g. "cladding — north", "Master Bedroom"). |
| Dimensions | The actual width / height the model used, with derivation. "17.68m × 3.0m + gable 4m²" means it added a gable triangle to the main wall area. "scaled from 10.99m overall" means it derived the dimension by proportion when no specific callout was visible. "estimated by eye" means no callouts; numbers are visual estimates. |
| Cutouts | Openings the model deducted (e.g. "window 1.2×1.5; door 0.9×2.1"). Empty when no cutouts were taken out. |
| Area | The model's net area for this surface. The total at the bottom sums these. |
| Conf. | Per-row confidence as a coloured percentage. Green ≥80% = high confidence (clear dimensions, simple geometry). Amber 50–80% = moderate (some estimation involved). Red <50% = low (heavy estimation, ambiguous boundaries). Verify red rows manually. |
The math breakdown is your record of truth — if a dimension in the breakdown doesn't match what's on the drawing, that surface's area is wrong. The polygons placed by Show-me are a visual reference for "which region is this row about", not a measurement record.
Three buttons on the breakdown card
- 📋 COPY
- Pushes the breakdown to your clipboard as tab-separated text. Paste straight into Excel, Google Sheets, Notion, or your takeoff template. Includes the total row.
- 💾 CSV
- Downloads a CSV file (e.g. cladding-takeoff-2026-04-28.csv) with the same data. Use this when you want a permanent record outside the chat.
- 📐 EXPAND
- Opens the breakdown in a wider modal for reviewing complex takeoffs. Copy and CSV are also available in the modal toolbar.
Improving the result
Four ways to refine a takeoff after the first answer lands:
- Edit in your spreadsheet (fastest)
- Click 📋 COPY on the math breakdown card, paste into your takeoff sheet, and edit any dimensions you can see are wrong. The numbers are decoupled from the visual pins, so you don't need to fight the AI when you can fix one cell in Excel.
- Improve (additive)
- Keeps the existing pins/polygons. Your next message adds NEW findings into the same group. Example: "I missed two downlights in the corner alcove." The new pins join the existing group; counts and totals roll up.
- Try again (start fresh with hint)
- Wipes the existing pins and prompts you for clearer guidance — e.g. a narrower scope or a feature it missed. Use this when the first attempt was on the wrong track.
- Drag corner handles
- Available on every selected polygon / measure line / shape annotation, including children of a group. Fine-tunes the visual outline without throwing away the rest of the takeoff. For measured area regions, open the region in the FLOOD editor (click it, or its row in the DRAFT TAKEOFF panel) — node edits, cutouts and smoothing all recompute the measured area and group total instantly. For count pins and other non-measured annotations, dragging changes only the marker position; correct those figures in the takeoff CSV.
For preferences that should apply to every query (house style, rounding, units), use Custom Instructions — see the FAQ below.
Accuracy expectations
Takeoff accuracy has real budget consequences, so here's what to expect:
- Counts: typically within 10% on legible drawings. Dense plans, ribbon windows, and items obscured by dimension callouts are the main miss sources. Always cross-check counts against the legend/schedule when one exists.
- Lengths (single-line measurements): ±5% when the drawing scale is set correctly. The biggest error source is the scale being wrong, not the AI — double-check your scale calibration if numbers look off.
- Areas (vector drawing, scale set): measured, not estimated. The AI finds each surface; the app traces it against the drawing's vector linework and computes the area at your calibrated scale — typically within ~1% of the dimensioned areas. The model is still told NOT to fabricate features (gables, parapets, returns) without visual evidence, so a low number is often genuinely a missing surface to point it at — not under-measurement. The per-surface rows in the DRAFT TAKEOFF panel are the record.
- Areas (scanned/photographed drawing, or no scale): nothing can be traced, so you get the model's visual estimate, clearly labelled as such — 10–20% under-count is common. Re-export from CAD and set a scale to upgrade every number from a guess to a measurement. The AI INDEX still helps the model find and label surfaces correctly either way.
For area takeoffs on vector drawings the number is measured — your review is about scope, not arithmetic: is the scale verified, is every surface that should count included (and nothing that shouldn't), are the cutouts right. For counts and lengths the AI is still an accelerator rather than a measurement — the breakdown shows its working so you know which figures to verify.
Honest limitations — read before you rely on a number
Area takeoffs on vector drawings are measured — traced from the linework at your drawing scale. Counts and lengths are still AI-read, and every mode has sharp edges. Keep these in mind:
- It can be confidently wrong. A clean one-line answer is not a guarantee — the model can miscount or misread a dimension without flagging it. Use the confidence column to prioritise, but sanity-check any figure that drives a price or an order, not just the amber and red rows.
- It only sees the page it read. Items in a separate schedule, a detail bubble, another sheet, or off-page are not counted — and the AI won't tell you something is missing. Absence is never flagged.
- Look-alike symbols get merged. Two items that render similarly (say a downlight and a similar-sized exhaust fan) can be counted as one. Check the legend and split the query by symbol when types are close.
- Poor source material reduces accuracy. Scanned or photographed plans, faint linework, overlapping hatching, and very small symbols all hurt reliability. Vector PDFs with printed dimensions give the best results.
- Know which numbers are measured and which are read. Area regions on vector drawings are traced geometry — the shape is the measurement. Count pins and length figures are AI-read: pin positions are approximate markers, and lengths come from the model adding up dimension callouts (there is no length tracer yet) — verify them with the MEASURE tool.
- Credits are spent whether the answer is right or not. A takeoff costs credits even if you then correct it, so use the free existing-data check first and make sure the drawing scale is set before measuring.
- You own the final number. For anything that goes into a quote, order, or contract, treat the AI's figure as a starting point to verify against the legend, schedule, and printed dimensions — not the deliverable. Doclio doesn't warrant takeoff accuracy.
Reading the takeoff CSV
Once you've accepted findings, they flow into the Actions tab. Export → Takeoff CSV gives you a SUMIF-friendly spreadsheet that includes columns such as:
| Column | What it means |
|---|---|
| Project / Drawing | Source drawing |
| Group / Item | The takeoff group head and per-row label (blank for standalone annotations) |
| Type | Annotation type (Takeoff, AI Finding, Note, etc.) |
| Title | Per-row label including the AI's area estimate (e.g. "Cladding — north · 38m²") |
| Count | For count groups: head + children total |
| Length / Length Unit | For length groups, per-row distance |
| Area / Area Unit | For area groups, per-row geometric area (NOT the AI's text estimate — that's in the Title) |
Each group ends with a TOTAL row summing children, then a blank separator row before the next group. Open in Excel or Google Sheets and run SUMIF on the Title column for the AI-quoted areas, or on the Area column for geometry-based numbers.
What it can't do (yet)
- Cross-drawing takeoffs. "How many downlights across all units?" returns a "not yet" message. Pick one drawing and ask there.
- Cost takeoffs. The AI counts items and measures regions; it doesn't know your supplier prices. Export the takeoff CSV and apply rates yourself.
- BIM-level precision. If you need CAD-grade quantities, the AI is a starting point, not the final answer. Verify against the legend, schedule, and any printed dimensions.
Cost summary
| Action | Credits |
|---|---|
| AI Index per drawing (one-off) | 3 |
| Content query (per page rendered — usually 1–3 pages) | 3 per page |
| Show me on drawing (auto-fires Refine to place + tighten pins) | 3 per 6 pins |
| Improve (adds missed items) | 3 per page (new Vision call) |
| Try again (replaces previous result) | 3 per page |
| Drag pins, accept, reject, export CSV | 0 |
Reviewing your AI usage
Settings → AI Assistant has a Recent activity section showing your last 50 AI queries. Each entry shows:
- Date and time of the query
- Type badge — TEXT (chat about project data), VISION (takeoff query on a drawing), DEEP DIVE (a Pro mode query — the chat toggle says Pro mode; the log badge reads DEEP DIVE), WEB (used web search), CACHED (re-read from a cached revision comparison)
- Metadata hints — small chips like "takeoff", "analyse", "improve", "+web" that show what kind of operation the query was
- Credits charged for that query
The activity log is per-user — you see your own queries, not your colleagues'. Question text is NOT logged server-side; only the metadata. Use this to audit your credit spend or understand which drawings have been queried.
Common questions
The pins all landed on the wrong elevation. What now?
Click Try again on the chat result. In your follow-up, name the specific elevation: "Only on the south elevation, not the north." The AI starts a fresh search with that scope.
The AI says "I'm not sure which drawing you mean."
You probably asked from the dashboard or a different view. Open the specific drawing first, then ask. Or include the drawing number in your question ("How many downlights on A-101?").
The cladding area is 30% under what I expected.
This is the most common AI takeoff complaint. Walk through the math breakdown card before assuming the AI is wrong:
- Look at the per-elevation rows. If a row uses "width 5,490mm" when the real wall is wider, the AI mis-read a partial dimension chain. Run the AI INDEX on the drawing (the ✨ icon next to the title) so the indexed dimensions become authoritative — this fixes the most common dimension error.
- Check what features are missing. If the drawing has skillion gables or parapets that don't appear in the breakdown, mention them in a follow-up: "You missed the gable triangles on north and south elevations." The AI re-walks the elevations with that hint and adds them only if they're actually visible.
- Cross-check cutouts. The cutouts column shows what was deducted (e.g. "window 1.2×0.8; door 0.9×2.1"). If the model deducted something it shouldn't have, ask: "Was that gross or net of openings?" and adjust.
- Surfaces NOT visible on the elevations. Wrap-around walls, returns, light wells, plant rooms can add 10–30% that aren't captured in standard elevations. The AI can only count what's drawn.
I gave the AI a target ("the answer should be ~168m²") and it ignored me.
That's by design — calibrating to a stated target produces numbers that look right but aren't grounded in the drawing. The AI uses your target as a signal to re-check the elevations more carefully (looking for skillion gables, parapets, etc.), but won't fabricate features just to close the math. Either it'll find a feature you mentioned and the total goes up, or it'll report its own number and explain the gap in the caveat. The math breakdown shows you what was actually counted.
Can I make the AI follow my house style? (e.g. always include eaves, round to whole m²)
Yes — Settings → AI Assistant → Custom Instructions. Anything you put there applies to every AI query (text-mode AND takeoff queries). Examples that work:
- "Always include eaves, soffits, and reveals in cladding takeoffs."
- "Round all areas to whole m²."
- "Use mm for lengths under 1m, m for everything else."
- "Quote confidence as a single sentence at the start of every takeoff answer."
The structural rules (per-elevation discipline, dimension authority, anti-fabrication) can't be overridden — they're load-bearing for accuracy. But most reasonable preferences will stick.
Can I save the AI's takeoff for later?
Three ways: 📋 COPY or 💾 CSV on the breakdown card (see "Three buttons" above), or Show me on drawing → Save as group — which turns the findings into a saved annotation group that syncs to teammates and flows into reports + the Actions tab takeoff CSV.
Does the AI learn from my corrections?
Not across sessions. Each query is a fresh look at the drawing. But the conversation context is kept while the chat is open — if you say "that's wrong, the small ones don't count" in the same session, the next query honours that. Once you close the chat, it forgets. For preferences that should persist, use Custom Instructions in Settings.
Feedback
If the AI gets a takeoff badly wrong on a real drawing, please email a screenshot + drawing PDF to hello@docl.io — we use real-world misses to tune the prompts.
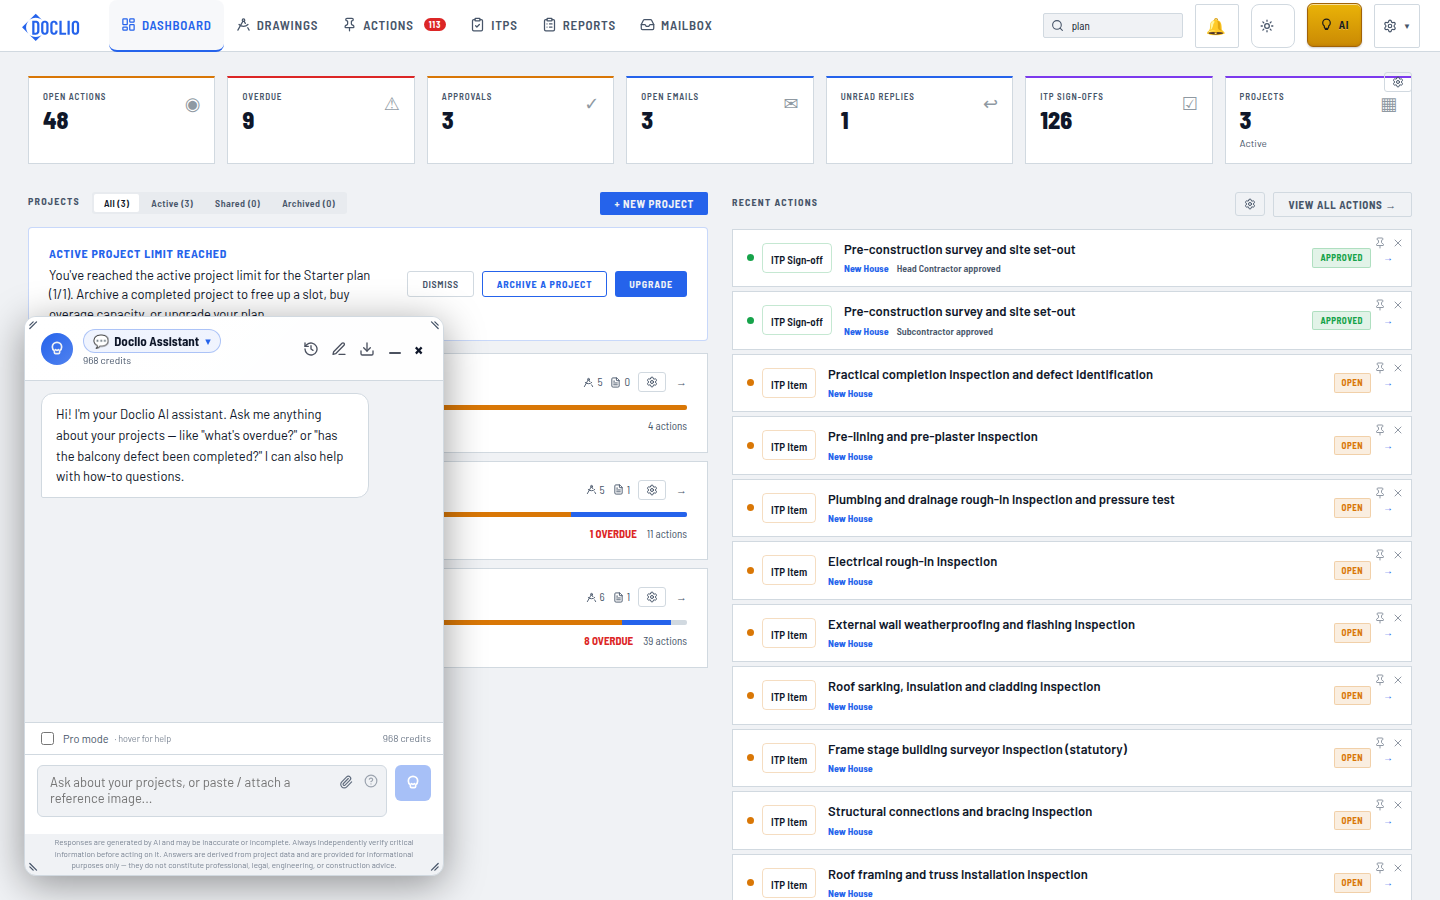
Available from the yellow AI button in the top navigation