Last updated: June 2026
The takeoff tool lets you count items, measure run lengths, and compute areas straight on a drawing — with running totals grouped by colour-coded categories you control. This article covers the manual takeoff flow. If you want the AI to do the counting for you, read Using the AI Assistant for Takeoffs instead.
Before you start
- Set a scale on the drawing. Open the drawing, click SCALE, draw a line on a known dimension, type the real distance. Without a scale, length and area totals come back as raw pixels. Scale only needs to be set once per drawing.
- Pick the right drawing. Open the floor plan (for area / count) or section / elevation (for line / count). Use TAKEOFF on one drawing at a time — quantities don't aggregate across sheets automatically.
The three takeoff modes
Click the TAKEOFF ▾ button on the toolbar. The dropdown opens with three picks:
| Mode | What you draw | What you measure | Best for |
|---|---|---|---|
| COUNT | Click each item once — a pin drops at the click point. | Tally (1, 2, 3 …). | Doors, GPOs, downlights, fixtures, sanitaryware. |
| LINE | Click vertices along a run, double-click to end. | Total run length (m or ft) once a scale is set. | Skirting, edging, kerbs, perimeter dimension callouts, services routing. |
| AREA | Click vertices around a region, double-click to close. | Polygon area in m² / ft². | Floor finishes, cladding, paint, render, joinery panels. |
A fourth entry on the same dropdown — MATCH — is for click-once vector symbol matching (covered separately).
Categories
Every takeoff is filed under a colour-coded category so you can tally multiple item types on the same drawing without them blurring together.
The defaults
New projects ship with three categories so you can start straight away:
- Floor (orange) — auto-selected when you pick AREA.
- Wall (blue) — auto-selected when you pick LINE.
- Door (green) — auto-selected when you pick COUNT.
So clicking TAKEOFF → LINE pre-selects Wall — you can start drawing immediately. To switch, click another category chip in the toolbar's chip strip before you draw.
Adding your own
Two places:
- From the chip strip while drawing. Click the small + at the end of the chip row. A modal opens — name the category (e.g. Skirting), pick a colour from the preset swatches or type a hex code, click ADD. The new category is immediately staged for this draw.
- From the pin form when saving the first item. Same + button on the CATEGORY row inside the pin form. Useful when you've finished drawing and realise you want a new colour for this run.
To rename, recolour, reorder, or delete categories: Settings → Project Config → TAKEOFF CATEGORIES. Deleting a category that's in use prompts you to reassign existing takeoffs to another category first (so you don't silently lose the colour grouping).
Colour cascade
The category's colour becomes the line / pin colour automatically. Drawing a Floor takeoff uses orange; drawing a Wall takeoff uses blue. Change the category later and every member of that group recolours. Override the colour for one specific item from the slim panel's COLOR control if you want a one-off variant.
Drawing a takeoff
COUNT
- TAKEOFF → COUNT. The category strip shows Door (or whichever default fits).
- Click each item — a pin drops with the category's colour and shape.
- The pin form opens after the first click. Type a title (e.g. "East elevation doors") and click PLACE & ADD MORE.
- Keep clicking to add more pins to the group. Each new pin becomes a child of the head.
- Click ✓ FINISH on the slim panel when you're done.
LINE
- TAKEOFF → LINE. Wall is pre-selected.
- Click each vertex along the run, double-click to end the line.
- The pin form opens. Title the takeoff (e.g. "Garden Edge"), pick category, set lineweight / style / colour on the appearance row, click PLACE & ADD MORE.
- Keep clicking + double-clicking to add more lines to the group.
- FINISH when done.
AREA
- TAKEOFF → AREA. Floor is pre-selected.
- Click each vertex around the region, double-click to close the polygon.
- Pin form, title, category, appearance, PLACE & ADD MORE.
- Keep drawing more closed regions to add them as children of the same group.
- FINISH when done.
The group panel
Click any takeoff to open the slim takeoff panel. The order from top to bottom:
- Title — click to edit. The title cascades through every child row as "Title #2", "Title #3", etc.
- CATEGORY — current colour-dot chip; click it to pick a different category from the dropdown or add a new one.
- HEIGHT — optional. For LINE takeoffs, height × length gives wall area in m². For AREA takeoffs, height × area gives volume in m³.
- GROUP TOTAL — aggregate readout ("4 lengths · 162.64 m"). Click the ▸ chevron to expand the per-item list. Each row shows the item's individual length / area + the user-editable title. Click a row to highlight that item on the drawing.
- Appearance row — opacity, lineweight, line style, colour. Adjusting any of these on the head cascades through every child.
Focus mode
Selecting any group fades every other annotation on the drawing so the takeoff you're working on reads bright. Drawing content (the PDF underlay) stays at full opacity — only the annotation layer fades. Deselect (click empty space) to bring everything back.
LABELS toggle
The LABELS pill next to MARKS / NOTES hides the count badges on group heads (the floating "+N") and the per-child index numbers (1, 2, 3 inside the group) without hiding the takeoffs themselves. Annotation outlines, type chips, and pin numbers stay visible. Useful when presenting to a client and the takeoff bookkeeping shouldn't be visible.
Working with groups
Highlighting a specific item
- Click an item in the GROUP TOTAL list — that item lights up on the drawing with a strong individual halo.
- Click an item on the drawing — the panel opens to the head's view with the clicked row highlighted in the GROUP TOTAL list.
Editing a child
The move handle + vertex handles appear on whichever item you clicked. For multilines and lines the move handle sits on the actual stroke, never floating off in a bounding-box corner. Drag the handle to relocate the whole shape; drag a vertex to edit one corner. The head stays as the side-panel selection so you don't lose your group context.
Deleting
Click the 🗑 trash icon in the slim panel header. If the takeoff is a group head, you'll see a warning:
- PROMOTE & DELETE OLD HEAD — pick one of the children from the dropdown, click. The chosen child becomes the new head and inherits the old head's title / category / height; the other children re-link to it; the old head is removed. Group stays intact.
- DELETE WHOLE GROUP — original behaviour. Removes the head and every child.
- CANCEL.
To delete just one child without affecting the rest, click the small × on that row in the GROUP TOTAL list.
Where the numbers show up
- Right-side ANNOTATIONS panel. Every takeoff group shows up as a single row with the item count + total. Filter by Type = Takeoff to see just the takeoff list.
- Actions tab. Same. Takeoff heads appear as actionable rows alongside notes / queries / issues.
- Reports. Takeoff groups flow into report content automatically without needing the "include markups" opt-in. Per-category subtotals are computed at report-build time.
- CSV export. Available from the Actions tab. Each row includes the head's title, category, total length / area, and the per-child breakdown.
Copying categories to a new project
When you create a project from a template (+ NEW PROJECT → Use template), the wizard offers a Takeoff Categories checkbox in the copy panel. Tick it to import the source project's category set into the new one — useful when a firm has a curated set (e.g. External Walls, Internal Walls, Wet-area Floors, Dry-area Floors) it reuses across every job.
Common questions
The total still shows in pixels.
The drawing doesn't have a scale yet. Click SCALE on the toolbar, draw a line on a known dimension, type the real distance. Once set, every takeoff readout switches to m / m².
I want to merge two separate groups into one.
Not supported yet. Redraw the items from one group under the head you want to keep, then delete the empty group.
My takeoff line is the wrong colour.
The colour follows the category. To recolour one item in the group, click it, then change COLOR in the slim panel's appearance row. To recolour the whole group, change the head's COLOR (cascades through every child). To change the category's default colour for every new takeoff, edit it in Settings → Project Config → Takeoff Categories.
Can I assign approvers to a takeoff?
Yes — but first enable the approval workflow on the Takeoff type in Settings → Project Config (it ships switched off). Once it's on, add approvers in the pin form. Note: only the head goes out for approval. Children are visible to the approver only via the list when they open the drawing.
Does the AI takeoff use my categories?
Partially. AI-generated counts always land in the "AI Finding" type, not a takeoff category. After accepting the AI takeoff, you can manually re-classify the head's category from the slim panel.
Related articles
- Using the AI Assistant for Takeoffs
- The Drawing Viewer — Scale & Measure tools
- Building reports from takeoffs
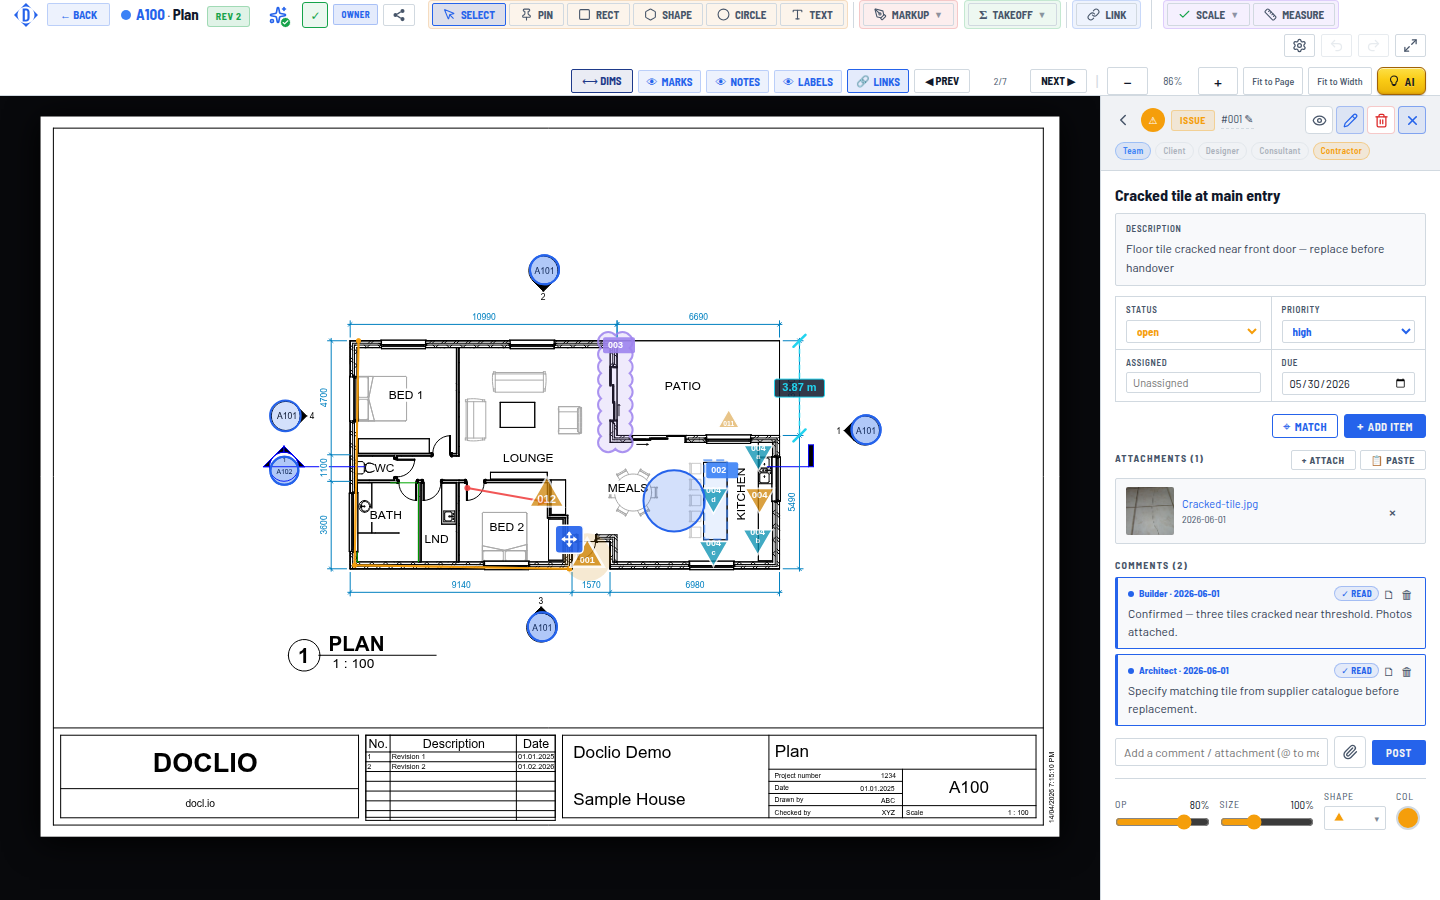
TAKEOFF, SCALE, and MEASURE controls in the Drawing Viewer toolbar