The 5-Step Report Builder
The Reports tab showing existing reports with type, status, and mode badges
Doclio reports compile your annotations and drawings into professional documents you can share with clients, contractors, and stakeholders.
Starting a New Report
- Open your project
- Go to the Reports tab
- Click + New Report
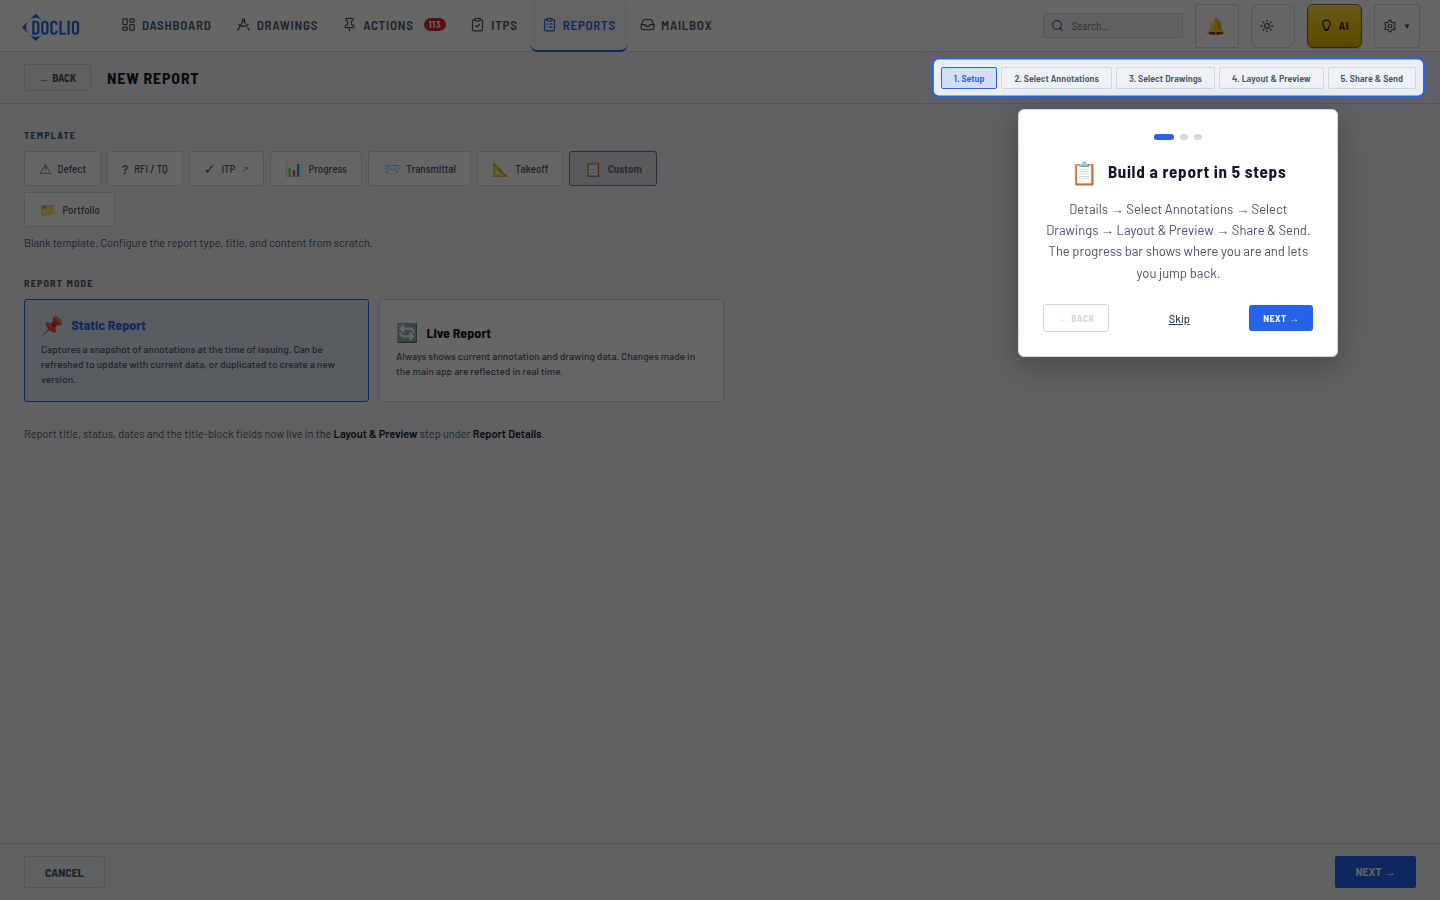
Step 1: Details
Set the basic report information:
- Template — Defect, RFI / TQ, ITP, Progress, Transmittal, Quantity, Custom, or Portfolio. Picking a template pre-fills the title and filters (e.g. Defect pre-selects Issue-type annotations).
- Report Mode — Static (a snapshot at the time of issuing, which can be refreshed or duplicated later) or Live (always shows current data).
- Report Title — e.g., "Defect Report — March 2026"
- Report Number — Auto-assigned (e.g., DEF-001), editable
- Status — pick from your project's status list, or enter a custom status
Step 2: Select Annotations
Select which annotations to include in the report. You can filter by type, status, priority, assignee, and tags to narrow down the selection.
Step 3: Select Drawings
Choose which drawings to include. Selected drawings will appear in the report with their annotation overlays.
Step 4: Layout & Preview
Configure how the report looks:
- Layout options for annotation display
- Preview the report before finalising
Step 5: Share & Send
Configure who can see this report and how recipients receive the link:
- Report Access — Public (anyone with the link) or Private (invited users only).
- Visible to Project Roles — Optionally restrict the report to specific share roles (e.g. only Designers and Consultants), even when other people on the project would otherwise have access.
- Add Recipient — Add external recipients in two modes:
- Report Only — A public link to view the static report. Best for clients and subbies who don't have a Doclio account.
- Full Share — A proper project share with capability, role, expiry, and re-share controls — same workflow as the Drawing Gallery / Settings share dialog.
- Notify recipient by email on Add — When checked, Doclio sends the standard invitation email automatically. Uncheck to skip the email and copy the link manually via the COPY LINK button on the recipient row.
See Sharing Reports for the full Step 5 walkthrough including the public URL preview, role-based visibility, and how the invitation link routes first-time users to the report.
Reports from the Mailbox
Reports aren't only built here. When you send a correspondence thread from the Mailbox, Doclio creates a Mailbox thread report automatically to bundle what you sent. These are tagged with their own type and can be shown or hidden using the source filter at the top of the Reports list (Reports / Mailbox threads / All). The default view hides them so your formal reports list stays clean; you'll always find them in Mailbox → Sent.
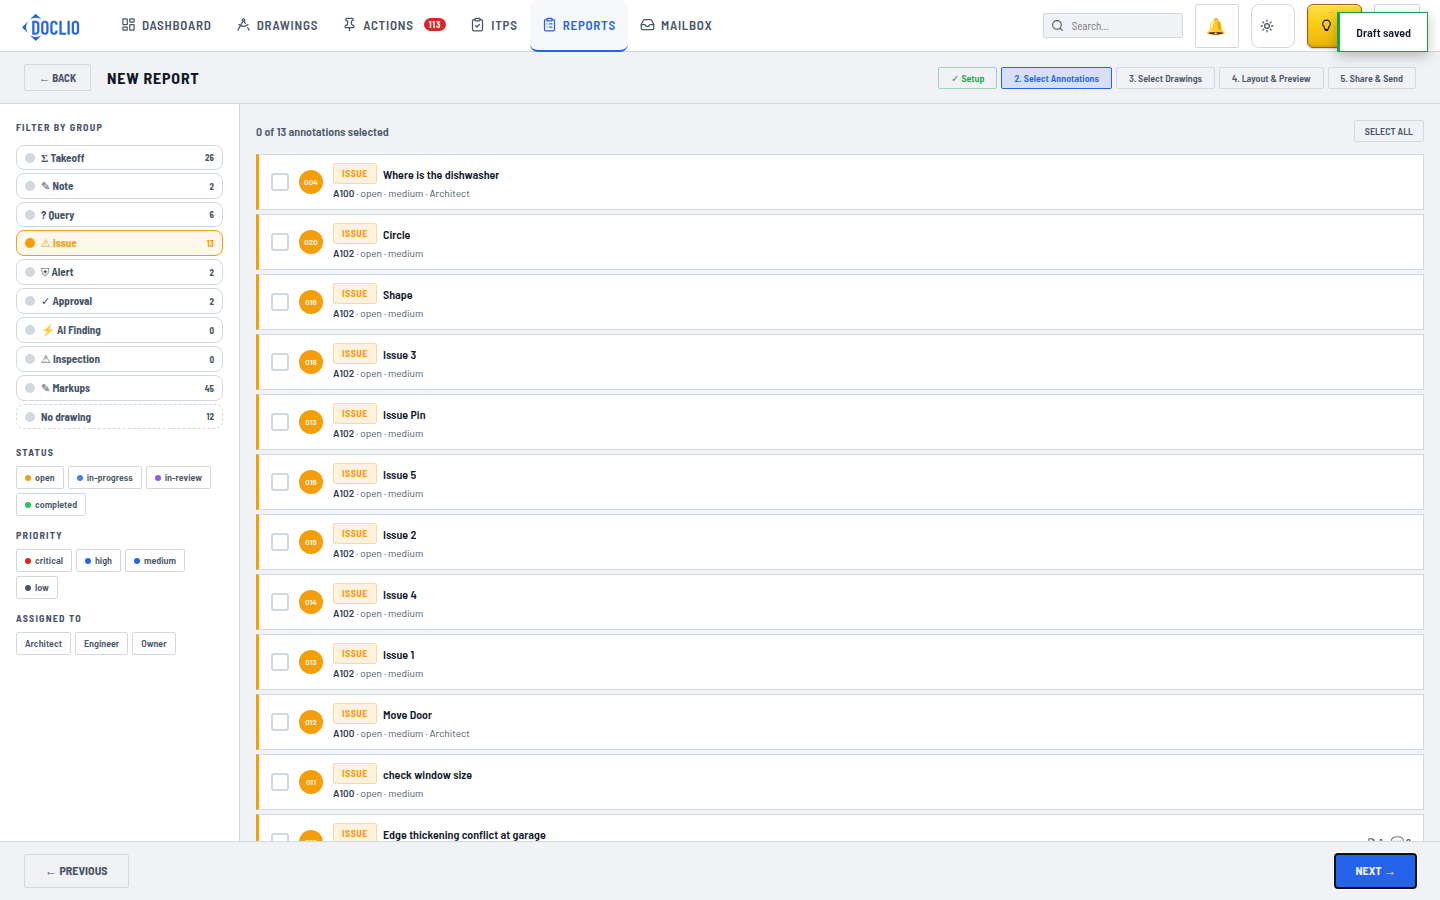
Filter by group, status, priority, and assignee, then pick which items to include
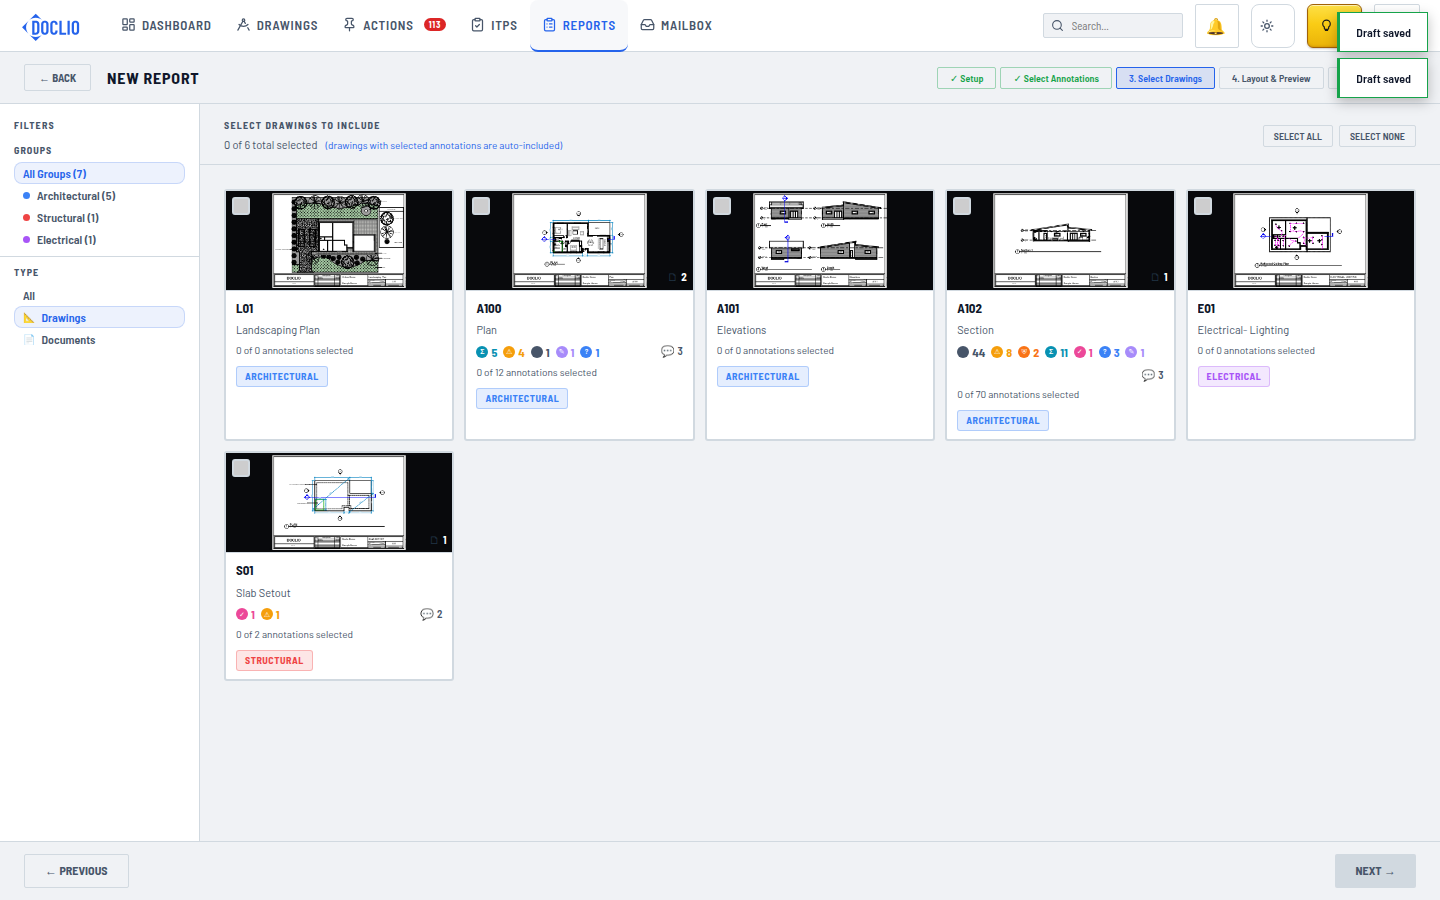
Drawings with selected annotations are auto-included; add more manually
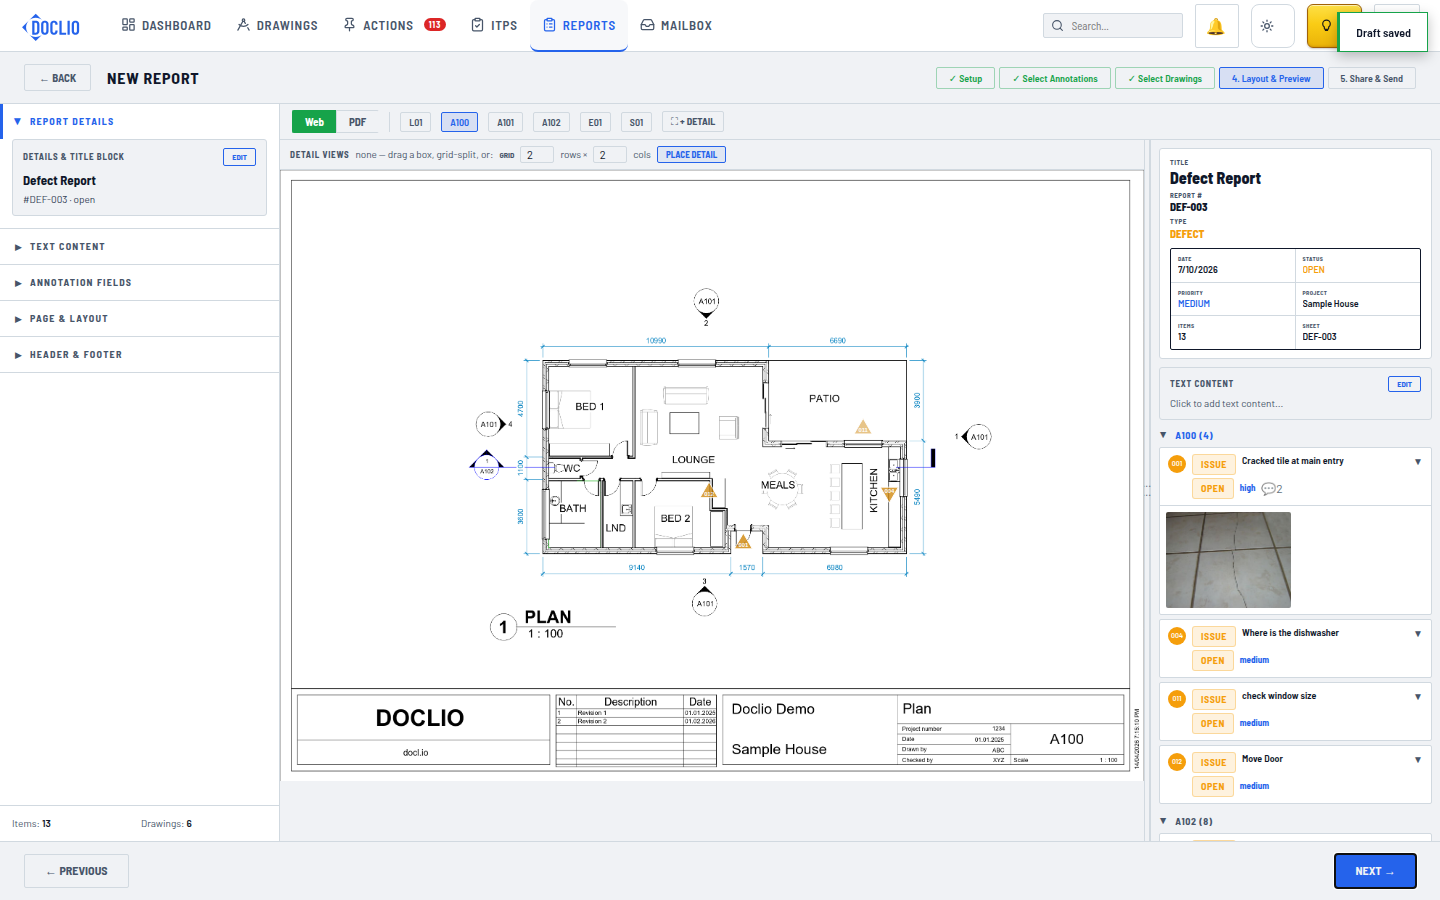
Full report preview with title block, annotation list, and photos, plus layout controls on the left
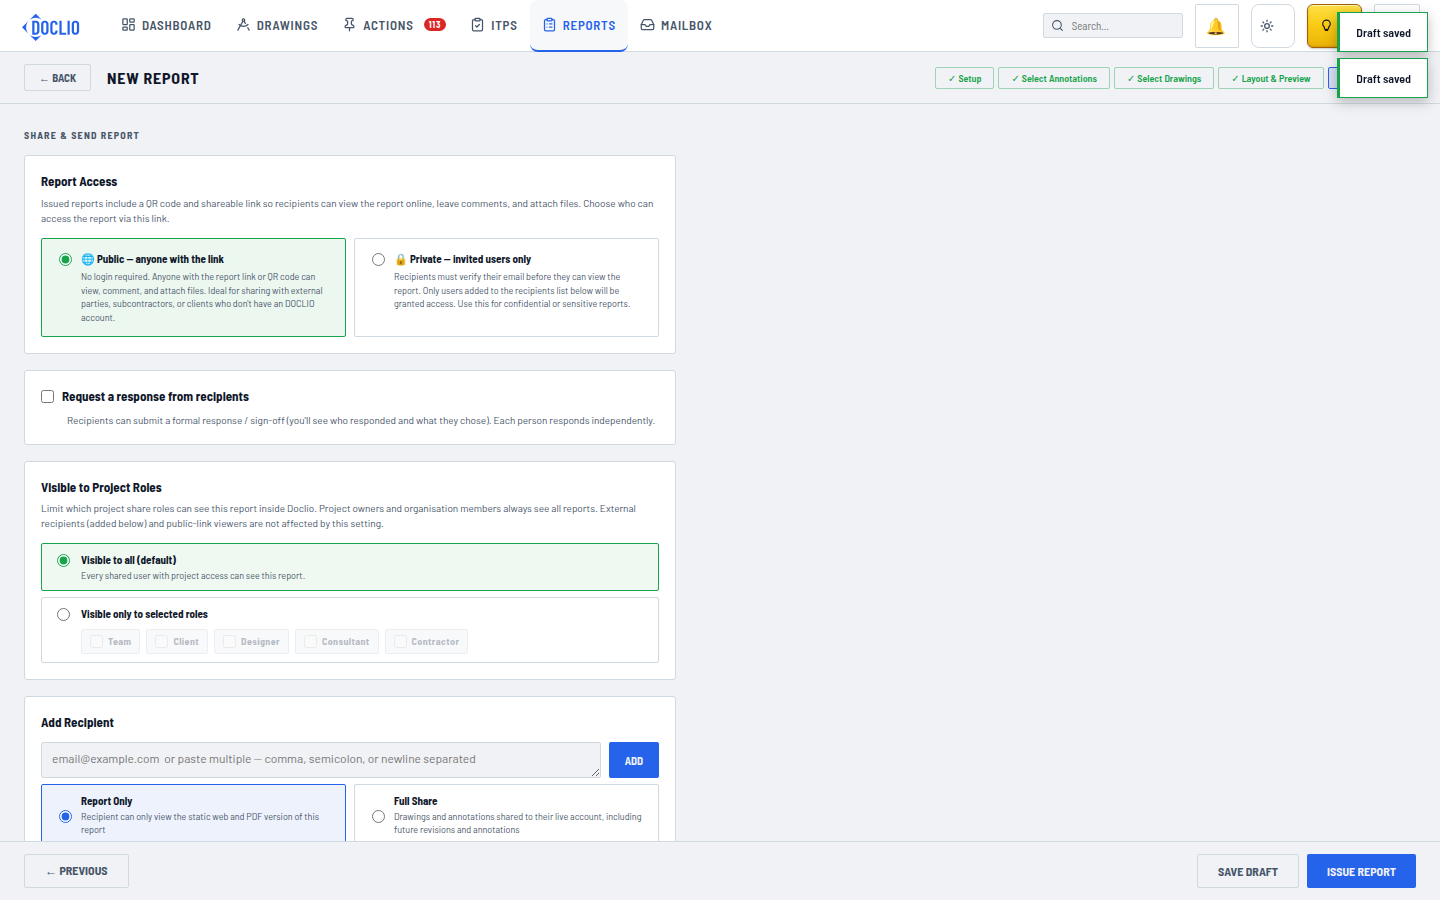
Public link or private invited-only access, visibility by project role, and recipient list