Viewing and Navigating Drawings
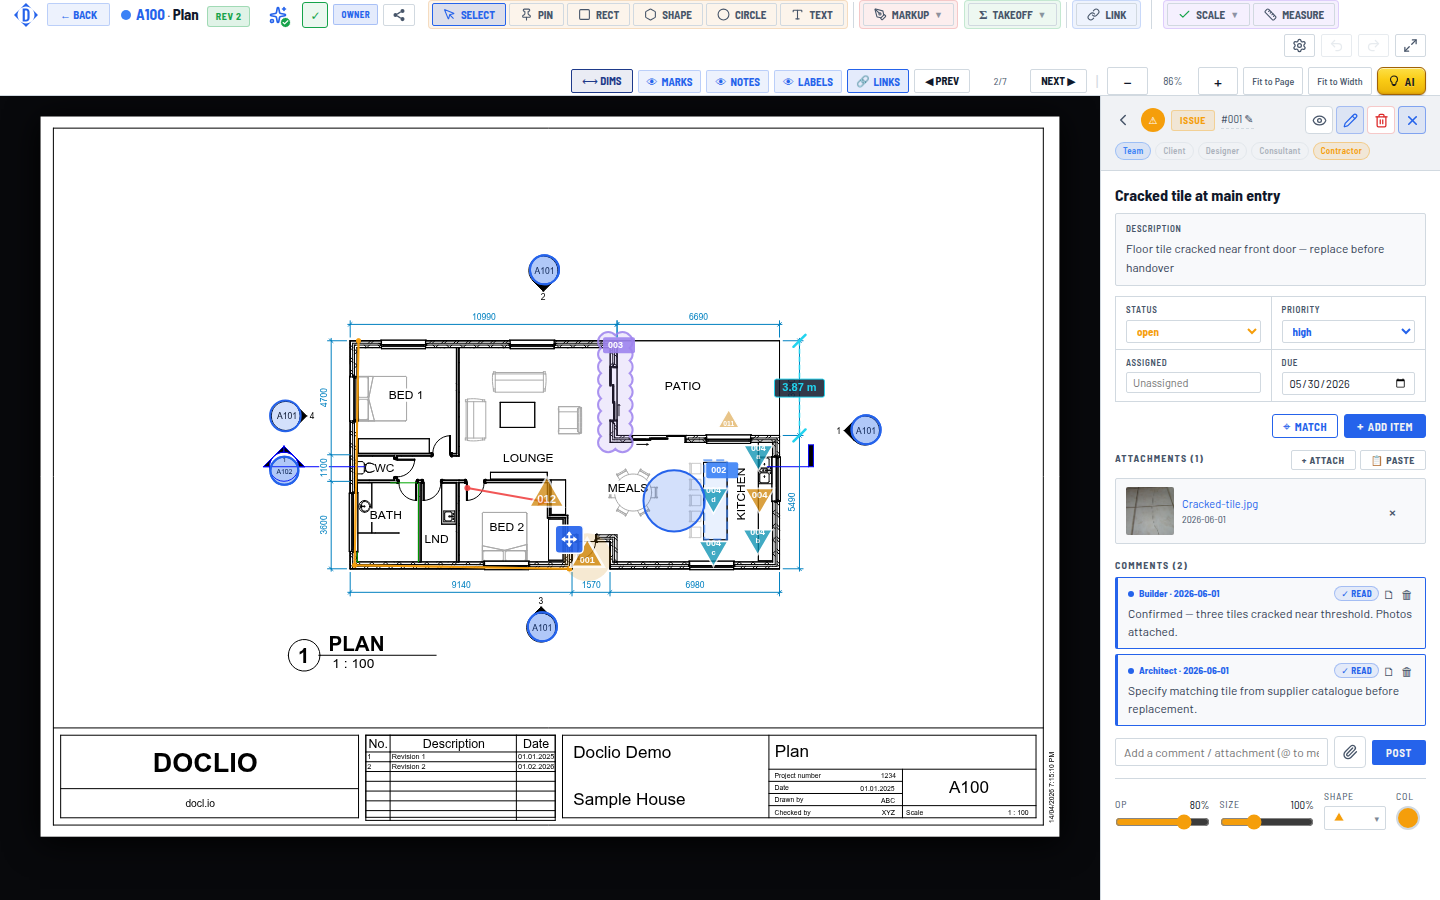
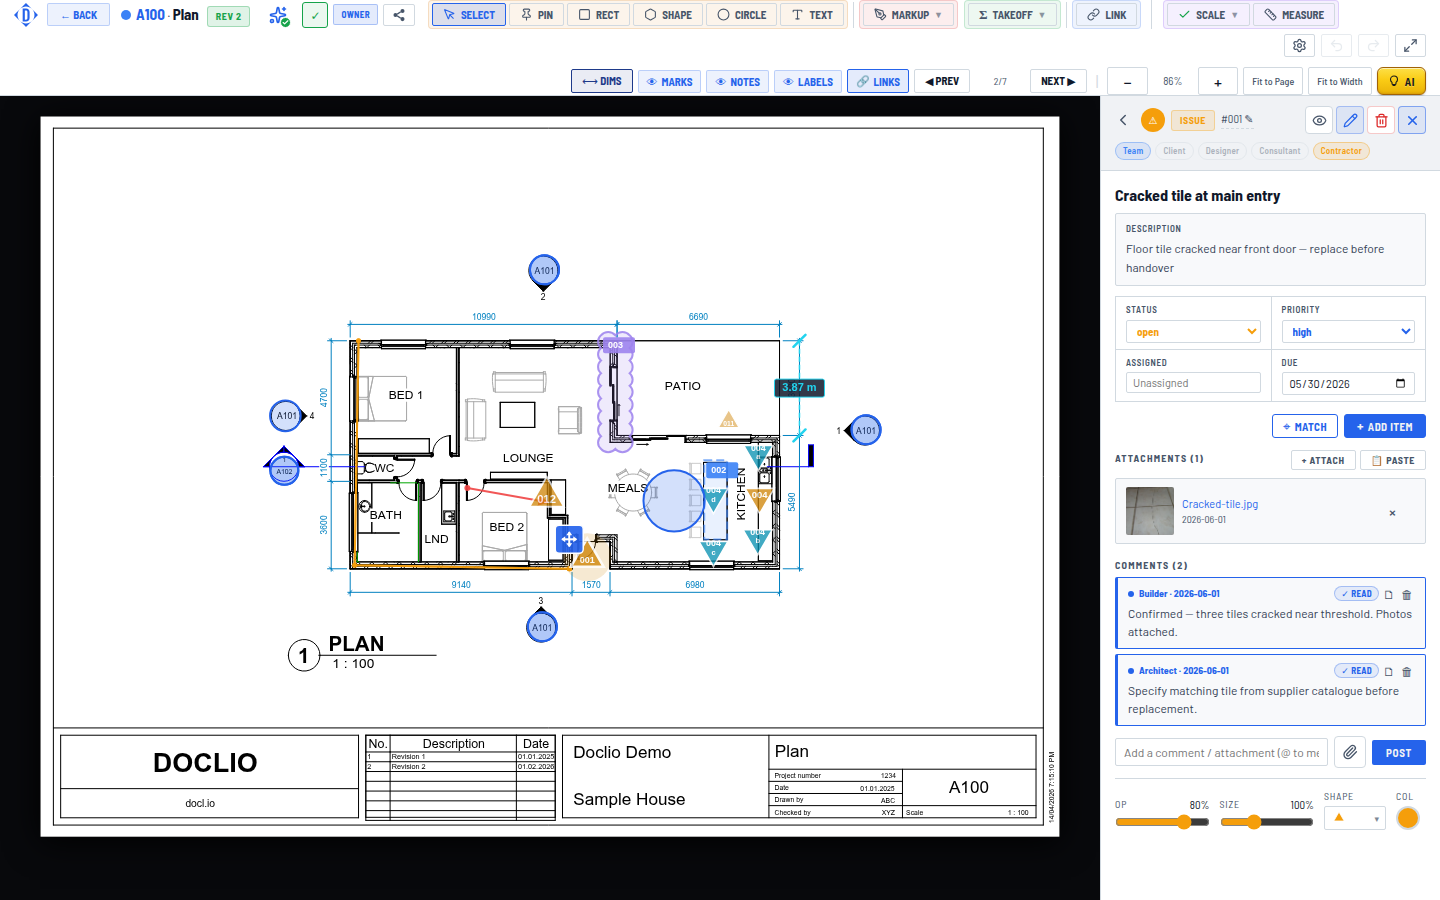
The Drawing Viewer with annotation tools, zoom controls, and annotations panel
The Drawing Viewer is where you view, annotate, and manage individual drawings. It opens when you click any drawing thumbnail in the gallery.
Viewer Layout
- Toolbar (top) — Drawing info, annotation tools, navigation, zoom controls
- Canvas (centre) — The drawing with annotation pins and shapes overlaid
- Side Panel (right) — Annotation list, details, comments, and attachments
Navigation Controls
- Zoom — Use the +/- buttons, scroll wheel, or pinch gesture
- Pan — Click and drag the drawing to move around
- Fit to Page — Click to fit the entire drawing in the viewport
- Fit to Width — Click to fit the drawing to the full width
- Page Navigation — Use Prev/Next buttons to move between pages in multi-page drawings
Toolbar Tools
| Tool | Description |
|---|---|
| Select | Default mode — click annotations to select them |
| Pin | Place a point annotation |
| Rect | Draw a rectangle highlight |
| Shape | Draw a freeform polygon |
| Circle | Draw a circle highlight |
| Text | Add a text label on the drawing |
| Measure | Measure distances on the drawing |
| Scale | Set the drawing scale for accurate measurements |
| Link | Create links between drawings |
| MARKUP ▾ | Dropdown of markup tools: LINE, ARROW, MULTI (multiline), FREE (freehand), TEXT |
| TAKEOFF ▾ | Dropdown of takeoff modes — COUNT, LINE, AREA, MATCH. See Takeoffs |
| MARKS / NOTES / LABELS | Visibility pills — toggle the markup layer, annotation pins, and number labels on or off |
Pin Appearance
Two controls sit with the visibility pills and change how annotation pins are drawn, without changing the annotations themselves. Both are saved for you and apply to every drawing you open — nobody else's view changes, and neither setting affects reports issued to other people.
| Control | What it does |
|---|---|
| PINS | A slider that scales every pin between 50% and 250%. Useful on a dense sheet, on a large monitor, or when you work zoomed a long way out. Click the percentage to snap back to 100%. |
| STYLE ▾ | How pins are painted. Four options, described below. |
Pin styles
| Style | Look | Suits |
|---|---|---|
| Dimensional | Solid colour, lit from above, with a soft shadow that lifts the pin off the sheet. | The default. Pins read clearly against busy linework and overlapping pins stay separable. |
| Knockout | White centre with a heavy coloured ring and a coloured number. | Dense sheets, and scanned or photographed drawings where a solid pin can disappear into dark linework. |
| Soft chip | Pale tint of the type colour with a saturated edge. | Reviewing the drawing underneath, where you want to see the detail a pin is sitting on. |
| Classic | Flat colour with a white outline. | The plainest option, closest to how pins looked previously. |
Pin numbers pick their own colour. Whichever style you choose, the number on a pin is drawn light or dark depending on how light the type's colour is, so it stays readable. This means an annotation type can be any colour you like — including bright yellows and other pale shades that previously had to be darkened to keep the number legible.
Pin style is separate from pin shape. Shape (circle, triangle, diamond, teardrop and so on) belongs to the annotation type, is set in project settings, and is the same for everyone on the project. See Understanding Annotation Types.
Drawing Notes
At the bottom of the side panel, you'll find Drawing Notes — a space for general comments about the drawing (not tied to a specific annotation).
Drawing Viewer